Frothing milk at home is simple and can be achieved without special equipment by using methods such as whisking or microwaving. Selecting the right type of milk can significantly improve the quality of your frothed milk, allowing you to create café-style beverages in your own kitchen.
Craving that perfectly frothed milk but lacking the fancy equipment? You’ve come to the right place!
Frothing milk at home doesn’t have to be complicated. With a few simple techniques, you can achieve that creamy, delightful foam without breaking the bank.
Let’s dive into the art of frothing milk using everyday tools around your home, ensuring you never miss out on that café-style indulgence.
Understanding Milk Frothing Basics
To froth milk like a pro, start by understanding the basics. Milk frothing is all about creating tiny air bubbles that integrate into the liquid, giving it that velvety texture and perfect foam. Tip: Opt for fresh, cold milk, as it’s crucial in achieving a successful froth. You’ll need to experiment with different amounts of milk and air to get the desired consistency. Remember, practice makes perfect when it comes to frothing!
Choosing the right milk is essential for frothing. Whole milk is often recommended due to its higher fat content, which creates a rich and creamy foam. However, low-fat and non-dairy options like almond or soy milk can also be frothed, especially if you prefer those tastes or have dietary restrictions. Tip: Experiment with various types to see which one gives you the desired texture and flavor.
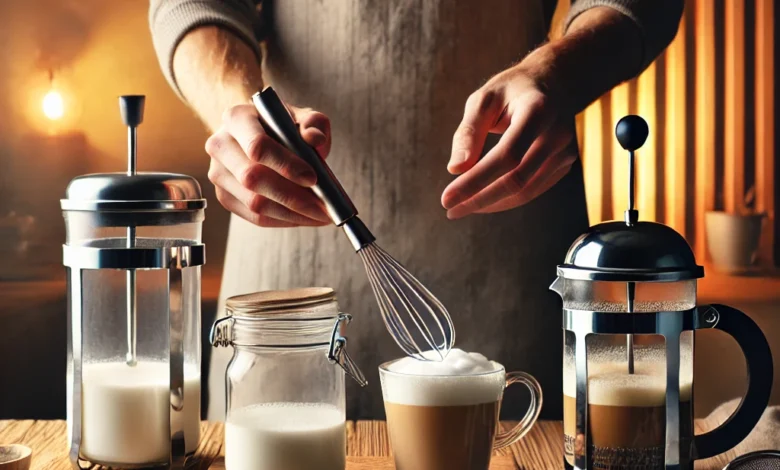
Using a whisk is a simple yet effective method to froth milk. Begin by heating your milk gently on the stove or in the microwave until warm. Next, vigorously whisk the milk back and forth for about 30 seconds. You’ll soon see it start to foam. Keep whisking until you reach your desired amount of froth. This method is perfect for creating a lush, foam-topped beverage.
The microwave can be a quick way to froth milk at home. Pour milk into a microwave-safe jar, filling it halfway. Secure the lid and shake the jar vigorously until the milk is frothy and has doubled in volume. Microwave the milk with the lid off for 30 seconds. This process stabilizes the foam to last through your drink. Voilà! Froth done in a jiffy.
Maintaining your frothing tools is key for a pristine frothing experience and taste. Always rinse tools like whisks or frothing wands immediately after use to prevent milk residue from hardening. Tip: Use a mixture of warm water and a tiny drop of dish soap for a thorough cleaning. Regular maintenance ensures your tools last longer and your milk retains its fresh taste.
Choosing the Right Milk
Choosing the right milk is essential for frothing.
Whole milk is often recommended due to its higher fat content, which creates a rich and creamy foam. However, low-fat and non-dairy options like almond or soy milk can also be frothed, especially if you prefer those tastes or have dietary restrictions.
Tip: Experiment with various types to see which one gives you the desired texture and flavor.
Using a Whisk for Frothing
Using a whisk is a simple yet effective method to froth milk. Begin by heating your milk gently on the stove or in the microwave until warm.
Next, vigorously whisk the milk back and forth for about 30 seconds. You’ll soon see it start to foam. Keep whisking until you reach your desired amount of froth. This method is perfect for creating a lush, foam-topped beverage.
Microwave Technique for Frothing
The microwave can be a quick way to froth milk at home. Pour milk into a microwave-safe jar, filling it halfway. Secure the lid and shake the jar vigorously until the milk is frothy and has doubled in volume.
Microwave the milk with the lid off for 30 seconds. This process stabilizes the foam to last through your drink.
Voilà! Froth done in a jiffy.
Cleaning and Maintenance Tips
Maintaining your frothing tools is key for a pristine frothing experience and taste. Always rinse tools like whisks or frothing wands immediately after use to prevent milk residue from hardening.
Tip: Use a mixture of warm water and a tiny drop of dish soap for a thorough cleaning. Regular maintenance ensures your tools last longer and your milk retains its fresh taste.
Mastering Milk Frothing at Home
Frothing milk at home without fancy equipment is both achievable and rewarding. By understanding the basics, you have the foundation to create the perfect foam.
Choosing the right milk, whether it is whole or a non-dairy alternative, can affect your frothing results, so explore what suits your taste best.
Simple tools like a whisk or using a microwave can effectively froth your milk, allowing you to enjoy a café-quality experience from your kitchen.
Never forget the importance of maintaining and cleaning your tools, as it preserves the quality of your froths and extends the lifespan of your equipment.
So, with these techniques at your disposal, transform your coffee or hot chocolate into a delightful, frothy treat anytime.
FAQ – Frequently Asked Questions About Frothing Milk at Home
What is the best type of milk for frothing?
Whole milk is recommended for a rich and creamy foam, but low-fat and non-dairy options like almond or soy milk can also work.
How can I froth milk without fancy equipment?
You can use a whisk or microwave to froth your milk at home using simple techniques.
Why is it important to clean frothing tools immediately?
Cleaning tools immediately prevents milk residue from hardening, ensuring a pristine frothing experience and longer tool lifespan.
Can non-dairy milk be frothed successfully?
Yes, non-dairy options like almond or soy milk can be frothed but may require some experimentation for the best results.
What is a quick way to froth milk using a microwave?
Pour milk into a microwave-safe jar, shake it until frothy, and microwave for 30 seconds to stabilize the foam.